

How To Setup Metamask Account and Add Custom Blockchain Networks
A step-by-step guide on how to create a Metamask wallet address and import any blockchain network.

A self-taught frontend developer, designer, and writer
For easier interaction with the decentralized web, storing digital assets or on-chain activities requires a vehicle in this case a blockchain wallet. Crypto enthusiasts and potential investors in the cryptocurrency space, including smart contract developers can't do without this tool.
In this guide, we will look at how to install a Metamask wallet, create a wallet account and import any blockchain network in a few steps. Let's get started!
Prerequisite
Basic understanding of cryptocurrency and blockchain technology.
What is MetaMask?
Metamask wallet is a blockchain wallet that enables a user to access decentralized applications on Ethereum, and store cryptocurrencies or other digital assets like NFTs.
You can find this wallet as a web browser extension or mobile application on Android and iOs.
How a Metamask wallet works
Metamask as a blockchain wallet stores and controls access to cryptocurrency which resides on the blockchain network.
You are provided with two keys when a Metamask wallet is setup:
Public key: This is automatically generated once the wallet is set up. It is a long string of hexadecimal with
0xas a prefix. It can be used to make transactions and receive cryptocurrency and payments. It is auditable and exists publicly on the blockchain.Private key: This is the password that is used to unlock your wallet and gain access to your digital assets.
Getting Started
Step 1 - Install Metamask
Go to your favorite desktop browser on your desktop and enter metamask.io. In this guide, we will be using the google chrome browser.

Click on the Download Button.
Alternatively, you can navigate the chrome web store by entering chrome.google.com/webstore/category/extensions on the tab. Enter "Metamask Wallet" in the search section, then click on the Add to Chrome button to install.
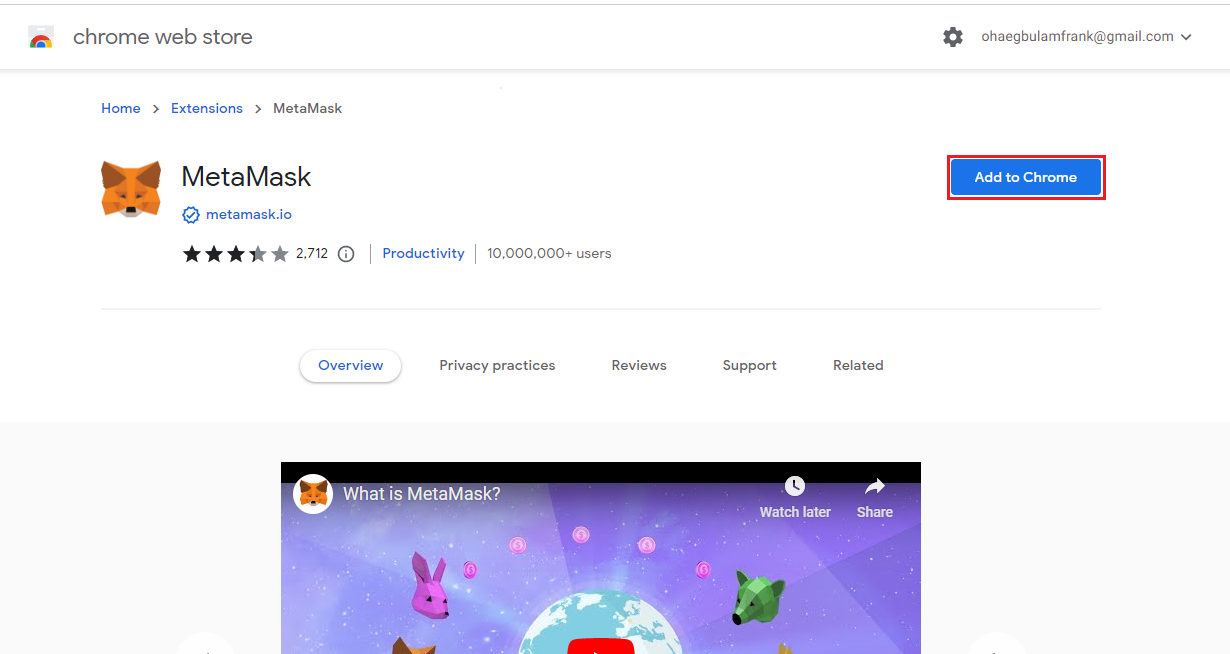
Approve extension installation to successfully download it.

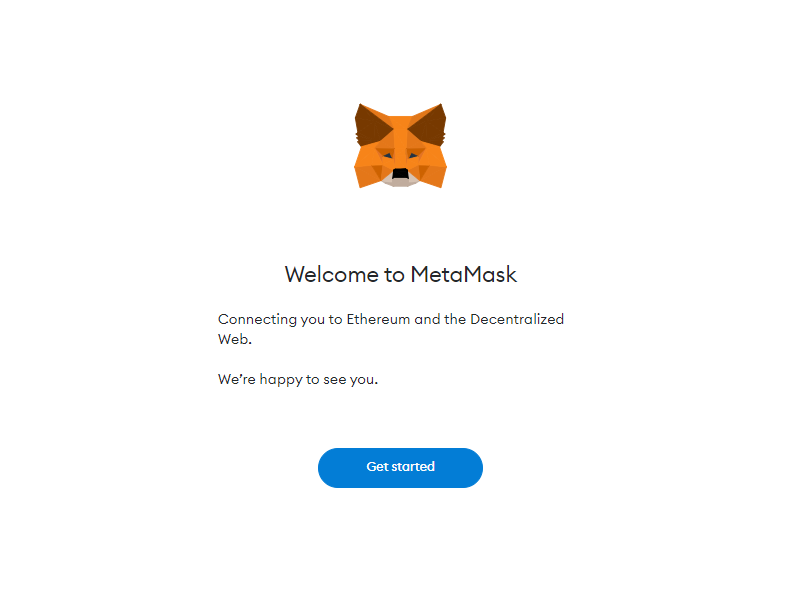
Step 2 - Create an Account
Now, You have to complete the onboarding process in order to create a wallet address.
You should now see an option to create a new wallet account or import an already existing one, that is if you have already created a Metamask wallet earlier.
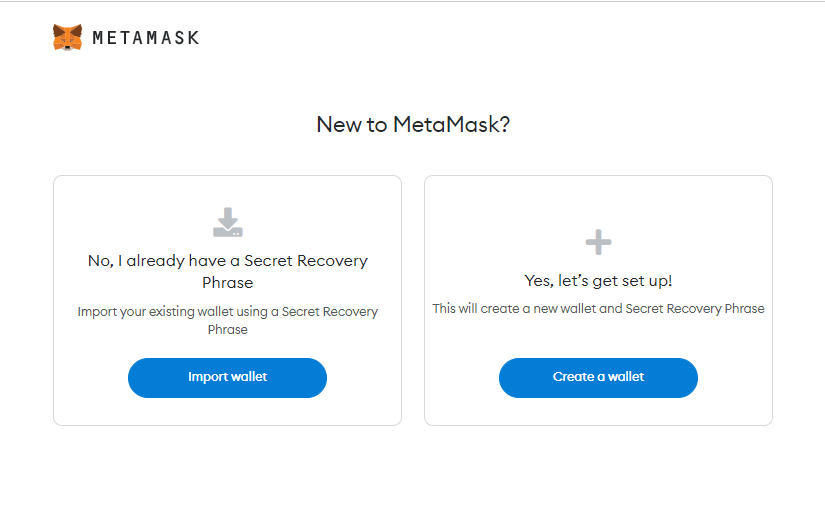
If you have an existing account on Metamask, simply import it using your private key or secret seed phrases.
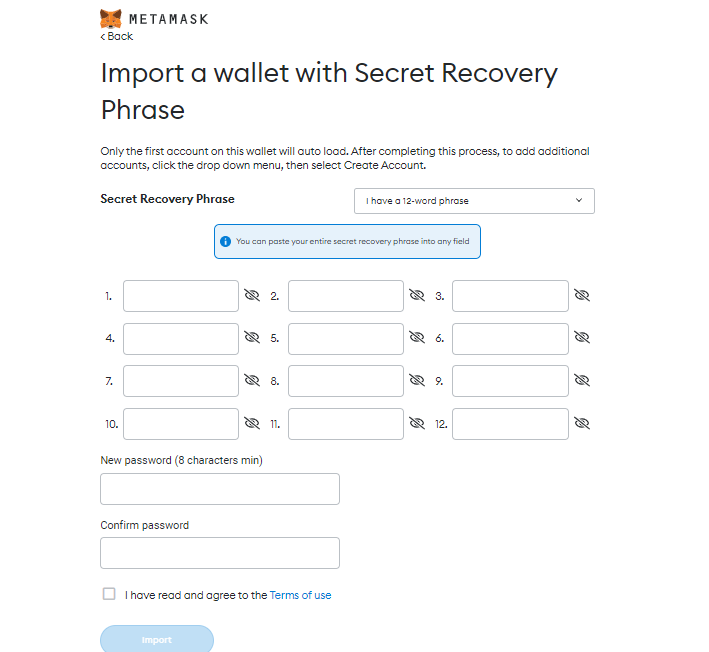
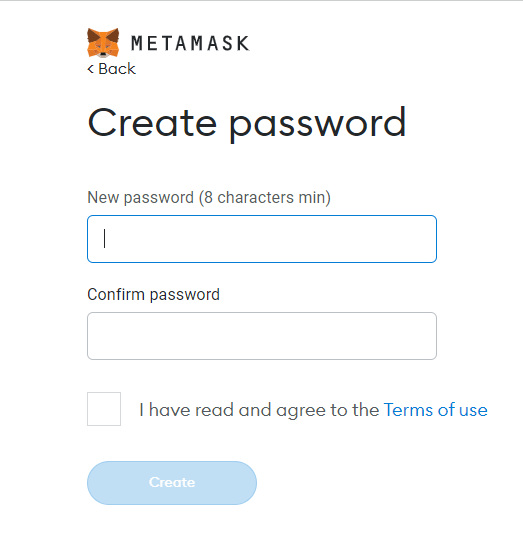
For new users, you are required to create a new account. Click on Create a Wallet. Then, generate at least 8 character long password.
Note: The Secret Recovery Phrases (Seedphrases) should not be revealed to anyone so you don’t fall victim to theft. It is advisable not to save them on your computer, mobile phone, or any electronic device because they are prone to cyber-attacks and hacks. Instead, it should be written on a paper or personal diary.
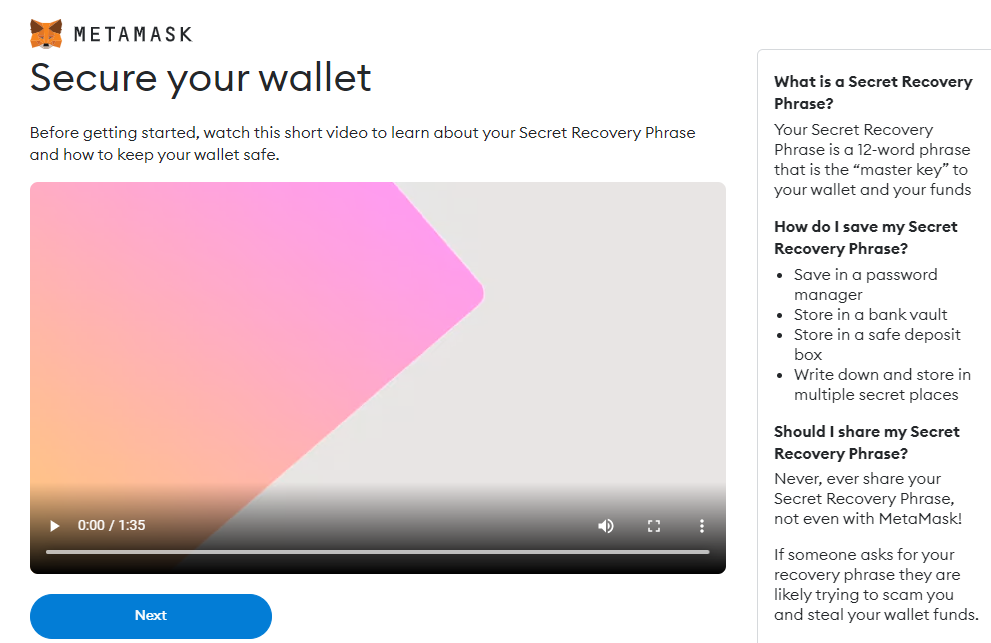
Step 3 - Set up Secret Recovery Phrase
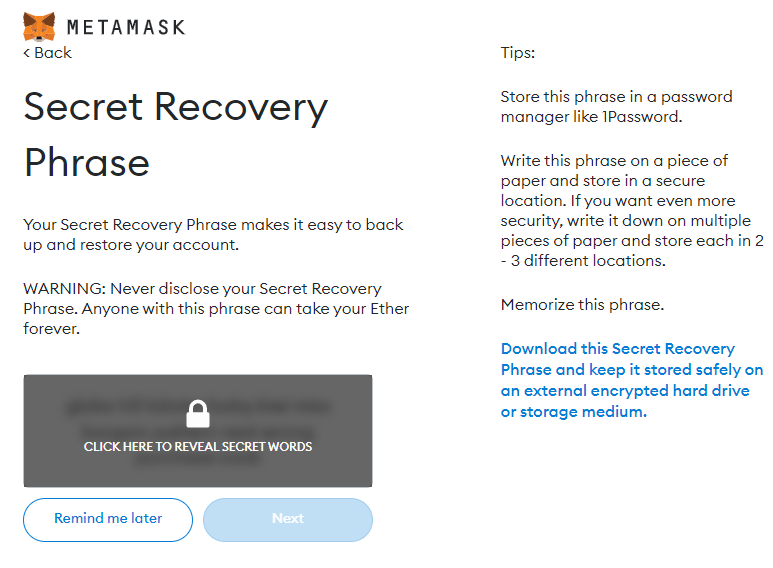
Here, select each seed phrase in the order revealed to you. Then, Confirm.
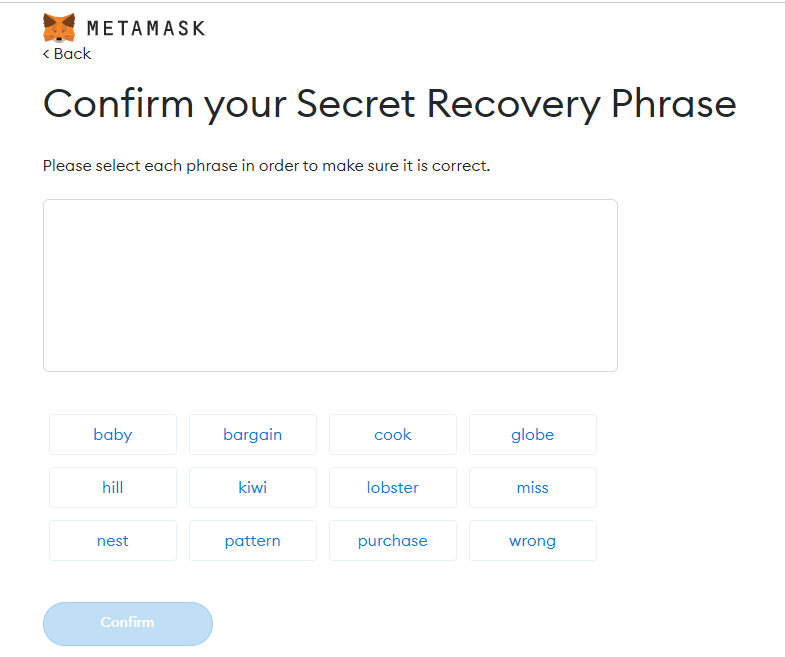
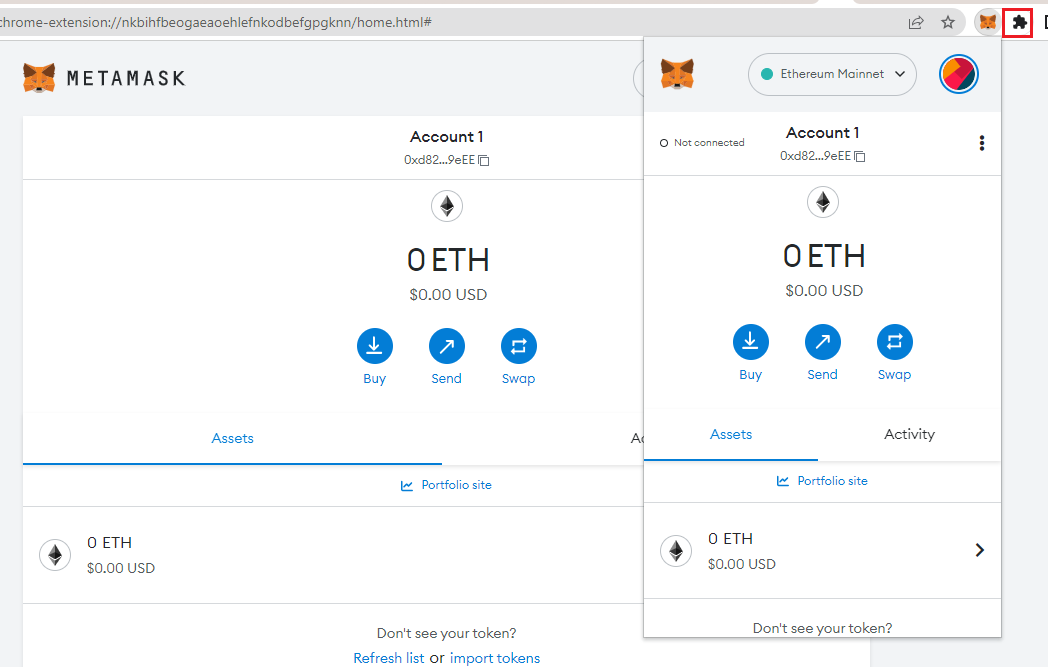
Congratulations! You just successfully created a wallet account.

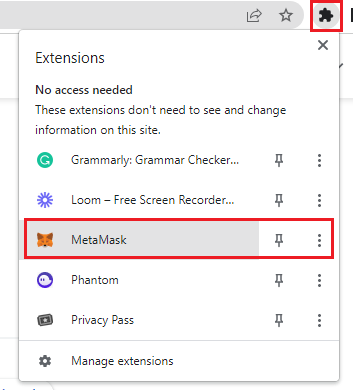
By default, newly installed extensions are pinned on the tab. Click the puzzle icon to display the modal, then select Metamask.
Importing Blockchain Network
The Metamask wallet was built to interact with decentralized applications on the Ethereum blockchain. This simply means it comes with Ethereum's main network (Mainnet) and its other Test networks (Testnet) by default. Also, any blockchain that will import makes use of the same wallet address which is mapped to the individual blockchain networks and support ERC-20 tokens.
For this guide, we will use the Polygon network to illustrate how to import a chain using three different techniques:
From Chainlist.org
From Block explorer
Manually
Step 4 - Import Blockchain Network from Chainlist
Visit chainlist.org, then click on Connect Wallet.
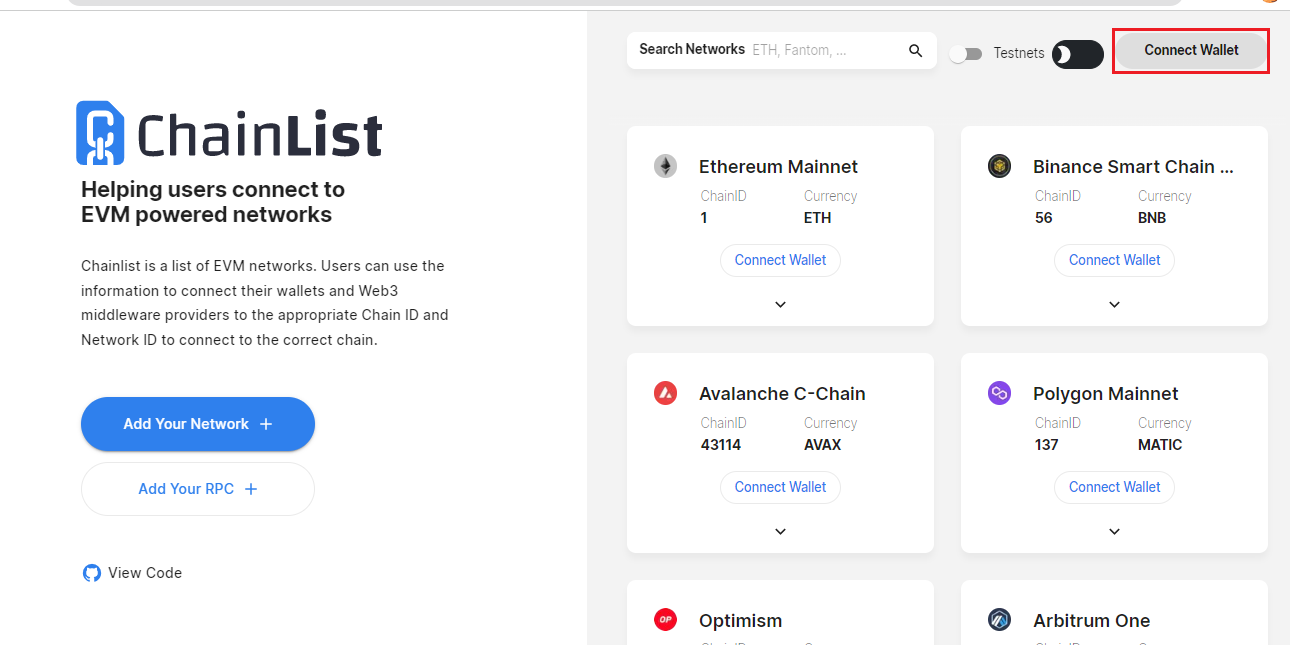
Once your wallet is connected, navigate to any blockchain network and tap the Add Network button. Verify and sign in to successfully add the chain.
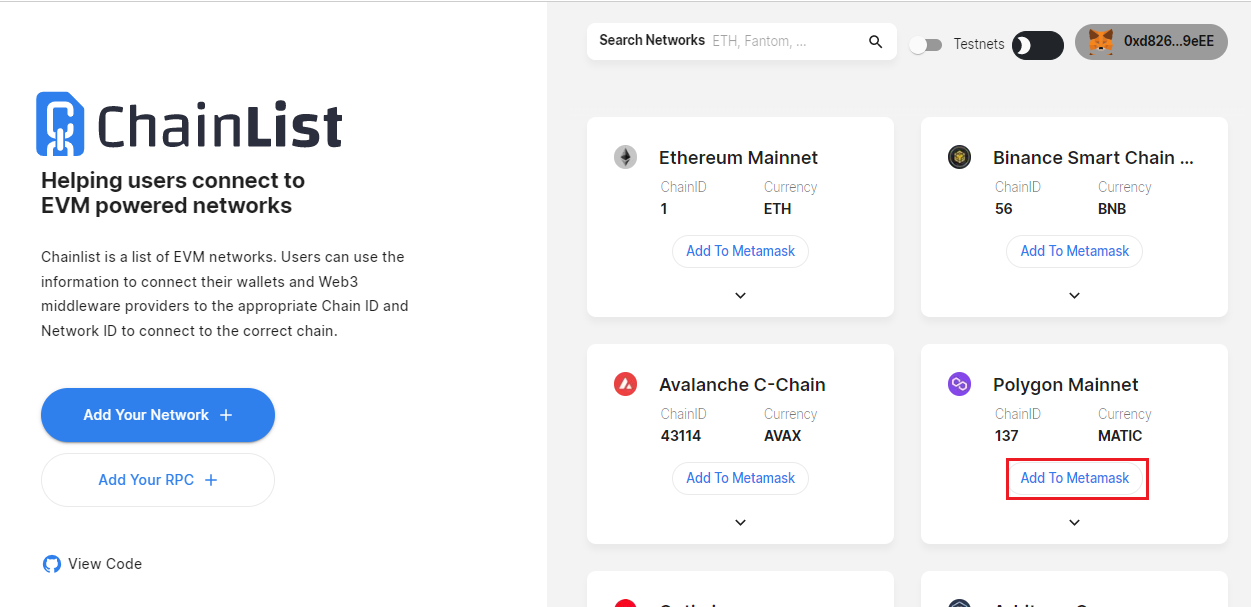
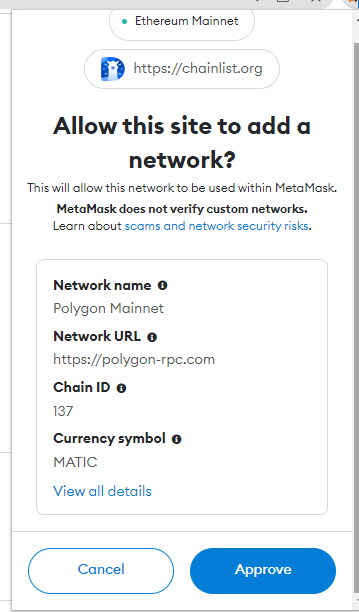
Allow Chainlist to add the network to your wallet.
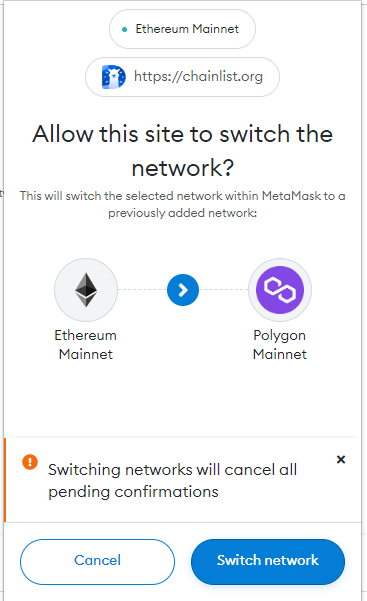

Now, you should see the added blockchain network (Polygon) under the Networks tab.

Step 5 - Import Blockchain Network from its Block explorer
Every blockchain network's block explorer has an embedded button around the footer that reads Add to Metamask. This is the simplest way to add the chain to your Metamask wallet.
For example, using the Polygon network block explorer polygonscan.io.
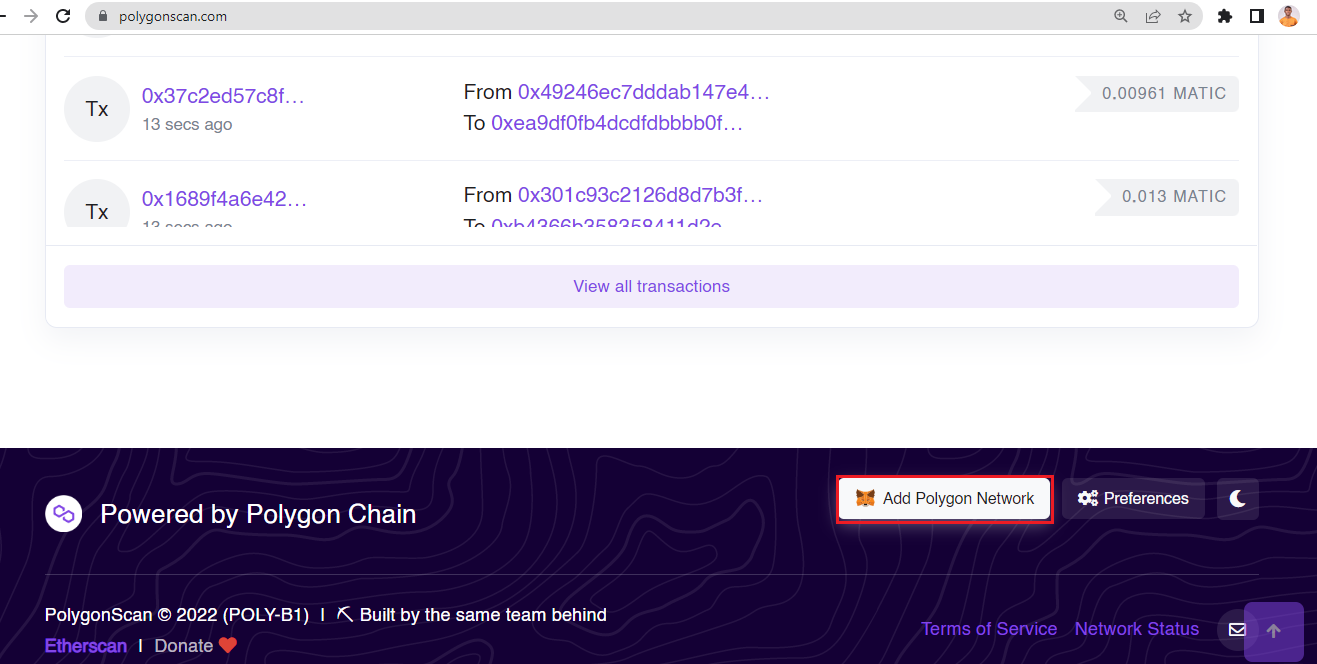
You will get a prompt to allow the site to add the network. Once the action is confirmed, the chain is added.
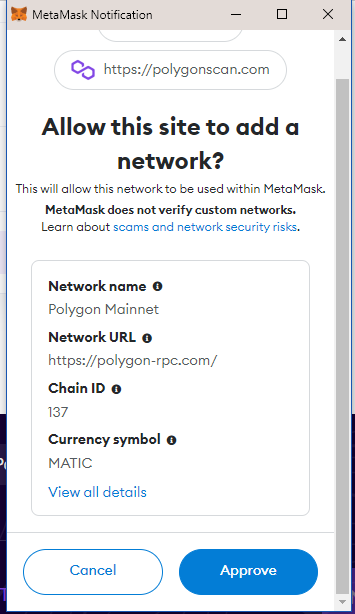
The request that popups allow a user to cryptographically sign a transaction in a blockchain network using their private keys.
Step 6 - Import Blockchain Network Manually
Tap on the account image then click on Settings.

Then, navigate to the Networks tab which displays a list of existing blockchain networks. Click the Add Network at the top-right corner to import any blockchain network.
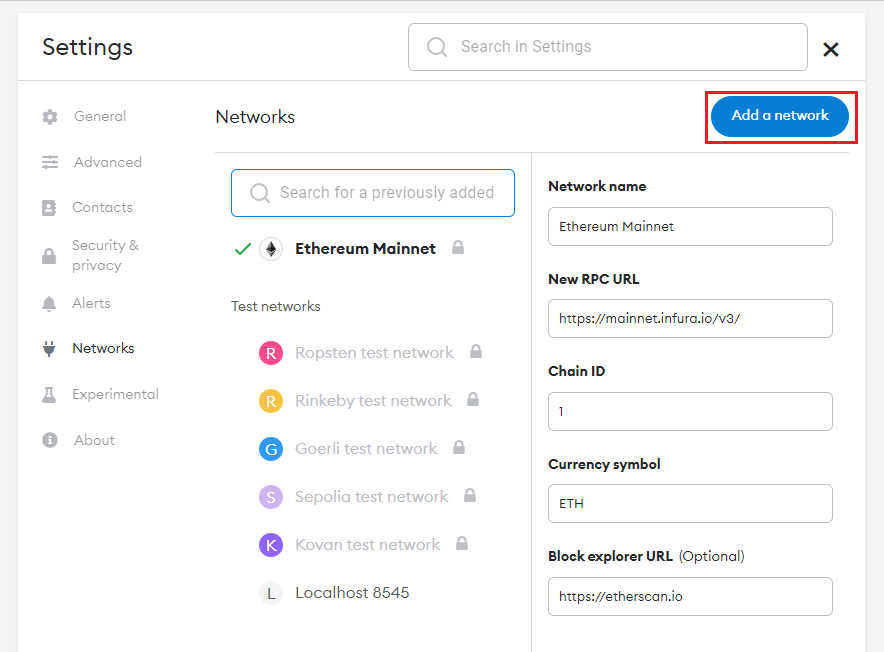
This takes you to a new page to manually enter the correct details such as the Network name, Chain ID, Currency symbol, and Block explorer URL of any blockchain network.
Enter the following Polygon blockchain network details in their respective input fields:
Network name: Polygon Mainnet
New RPC URL: https://polygon-rpc.com/
Chain ID: 137
Currency symbol: MATIC
Block explorer URL(Optional): https://polygonscan.com/
Conclusion
As we have seen, setting up a Metamask wallet and importing networks is flexible, giving freedom to interact with other blockchain networks aside from Ethereum.
For the purpose of this guide, the Polygon network was used to illustrate. However, this same procedure applies to any other blockchain network. In addition, you can easily set up a Metamask wallet on your mobile device using the Kiwi Browser and follow the steps mentioned in this guide.
I hope you found this helpful. Feel free to share and check out more content like this on my blog.


